Monday, December 27, 2010

Uncle Pete's Baked Shrimp


What are you doing on this snowy Monday? We're getting hammered with this blizzard, but so far-knocking on wood-we still have power remarkably enough! It's really a good day for staying in and cooking! What can we make?

I had early 4am detail for shoveling this morn, so as soon as I came in, I put on a big pot of sauce. Meatballs you'll always find in my freezer, readied for a hungry crowd. I knew the kids would really work up an appetite when they come in from their detail. The winds are howling along with much drifting snow, and the visibility is just awful here so no one is getting out on these roads, not if I have anything to say about it :) So as I grabbed the meatballs I spotted some shrimp in the deep freeze, and as we didn't have our Christmas Eve seafood, why not today?

My Uncle Pete made the best baked shrimp I've ever eaten. Such an easy dish that disappears off the platters typically made for a gang, with it's buttery crumb topping, it's sure to be a crowd pleaser. When I was a youngster and our family got together, my uncle would make trays of this dish, as well at holiday time. I have fond remembrances of him lowering the tailgate of the station wagon on a hot summer's day at the beach and lining up these trays of shrimp for all to enjoy. I just made one casserole dish as I knew we had plenty with the pasta, salad and crusty peasant bread. Double or triple this recipe as needed. No need to worry about leftovers--there won't be any. Stay warm.


Uncle Pete's Baked Shrimp

2 lbs thawed and rinsed frozen jumbo shrimp
1 cup melted unsalted butter
2 tsp worcestershire sauce
4-6 drops tabasco sauce
2 cups Ritz crackers crushed
1 cup corn flakes, crushed
2 scallions, minced
1/2 tsp dried thyme, rosemary and oregano blended
zest of one lemon
hot pepper flakes **optional

Pulse the Ritz cracker and corn flakes in a food processor until you have a rough crumb. Drizzle the melted butter, scallions and seasoning in thoroughly. Drizzle a bit of oilive oil into a 2 quart casserole and layer in the shrimp, alternating with the crumb mixture. Mix all together and pack onto and around the shrimp. Foil cover and bake in a 400 degree oven for only 18 minutes--no longer and serve. Enjoy!

Sunday, December 19, 2010

Christmas confections


Well it’s nearly here. Are you all set for it? Shopping done? Christmas cards mailed? Gifts all wrapped? Cookies and confections all made? Isn’t it crazy how we all overextend ourselves this time of year? I’m guilty as much as the next one most years, but this year I decided to put a stop to all the craziness and simply enjoy this holiday. Well except for the cookies and sweets ;-) In spite of the hectic schedules we all experience this time of year I have to say I had a blast baking trays of cookies and candies--Anise cookies, almond biscotti, Todo's, tea cakes, pizelles, date nut balls,chocolate espresso's, fennel pistachio cookies, cappuccino blondies, brownies, peanut butter cookies, assorted fudges, peanut and almond brittles, limoncello bars and of course gingerbread men.


I think everyone needs a good 'visiting cake' during the holidays. You know the ones? You get a call about a last minute get together and will you please bring dessert? Well you'll need something that's delicious and easy-to-make right? This one is mine. It's moist, buttery, and mildly sweet, and pairs perfectly with a cup of tea of coffee.

May the special gifts of Christmas be yours to treasure this holiday season. Merry Christmas! Buon natale! xo


Cranberry Amaretto Sour Cream Cake

1 1/2 sticks unsalted butter
1 1/2 cups sugar
3 eggs
1/2 pint sour cream
2 1/2 cups all-purpose flour
1 tsp baking powder
1 tsp baking soda
1/8 tsp salt
1 teaspoon vanilla extract
1/4 cup Amaretto
1/4 cup chopped walnuts
2 TBLS sugar
2 tsp cinnamon
1 can whole cranberry sauce

Almond Glaze:

2 TBLS milk
3/4 cup confectionary sugar
1/4 cup Almond extract


Preheat oven to 350 degrees. Grease and flour a 9-inch Bundt or tube cake pan.

In a mixing bowl, cream butter and sugar until light and fluffy. Add eggs one at a time, beating after each addition.Add the sour cream mixing well.

Combine flour, baking powder, baking soda, and salt and blend this into the creamed sugar mixture. Mix in the Amaretto and vanilla extract. Pour 1/3 the batter into the prepared pan. Sprinkle chopped walnuts, sugar and cinnamon. Add a little more batter. Spoon whole cranberry sauce for your next layer and top with the rest of the batter, swirling the cranberry into this top layer. Bake 1 hour, or until golden brown.

For the almond glaze: Whisk the sugar and milk until creamy and smooth. Add in almond extract. Pour this glaze over completely cooled cake and serve. Happy holidays!

Monday, December 6, 2010

On the mend Chicken Pot Pie

Our good friend Steve recently got out of the hospital after some surgery with specific instructions to simply take it easy and not overdo! You have to know Steve, to see how difficult a task this would be for him--he's just one of those people that's always on the go and very active senior. About the only time he really slows down is at mealtime. But since he got home he's been complaining about always feeling 'cold'. So I popped in on him the other day for two reasons. One to see that he was following his doctors orders {and, I promised his wife I'd harp on him of the benefits of him following those orders :) and to bring him a warm pot pie just out of the oven. What better dish will warm you from the inside out and brings a big smile to the recipients face? Chicken Pot Pie, that's what!


This is a very easy pie to make, especially for those on the run, and these days who isn't busy? We just love chicken pot pies around here, and though I typically make mine with a buttery flaky crust, this time just used puff pastry sheets. I also like my chicken pot pies loaded with vegetables. You can prepare four individual five inch pies or one large pie from this recipe. This one features chunks of chicken with big pieces of carrots, potatoes and peas jammed with a savory herb gravy.

Cricket Corner Farm Chicken Pot Pie

3 cups chicken broth (homemade or stock)
1 cup dry white wine
3 cups boneless chicken breasts cut into cubes
1 1/2 cups fresh carrots, cut into pieces
1 1/2 cups peeled potatoes, cubed
1 1/2 cups frozen petite peas
4 TBLS unsalted butter
6 TBLS flour
1/2 tsp fresh thyme
sea salt & ground pepper to taste
One pie crust topping.. or puff pastry to cover


Pour the chicken broth and wine into a large skillet and bring to a simmer. Add chicken pieces, carrots and potatoes pressing them down into an even layer. Cover the skillet and return to simmer. Tilt the lid slightly to let the steam escape and cook for 15 minutes. Turn off the heat, add in the peas, cover and let sit 15 more minutes. Strain the hot broth from the mixture into a bowl and reserve. Let the veggies cool off.

In a heavy saucepan melt the butter over low heat. Add the flour and whisk together for just a few moments. Add the reserved broth all at once and whisk briskly. Bring to a gentle boil--then lower the heat and stir until the sauce is smooth and thickened. Add fresh thyme leaves and seasoning to taste.

Pour the sauce over the chicken and vegetable mixture in the skillet and stir well. Transfer the mixture to a 2 1/2 quart or four five inch individual pie tins and set aside. Top with your favorite pie crust or puff pastry cover. Pierce the pie to vent and bake in a 350 degree oven approximately 40 minutes or until the crust is golden brown and just bubbly. Enjoy!

Sunday, November 7, 2010

Red Beans with Orechiette

Looking back over the last few weeks, it seems something I typically make at least weekly around our house has been missing. I know what it is--pasta! Give me a big bowl of any pasta swimming in Sunday sauce and I am one happy camper. But we also enjoy beans equally as much. Any kind of shell bean is just fine by me, and I try to incorporate them in many of my favorite dishes as possible.

It's been a very busy week for me and this is an easy dish to prepare when you're on a tight schedule. And even better, this is great comfort food perfect for a chilly evening meal. What I like the most about this sauce, is that it may be eaten straight up on it's own, or served over any smaller pasta of your choice. I oftentimes make extra just to tuck a few containers in the freezer for a quick lunch. It's a great winter dish that will warm you from the inside out.


Red Beans with Orrichette

1 1/2 cups red kidney beans, rinsed & drained
olive oil
2 red onions, chopped
2 1/2 cups chopped celery
3 carrots, diced
3 garlic cloves, minced
1/4 cup white wine
1/4 tsp red chile flakes
fresh basil & rosemary, finely minced
4 TBLS fresh parsley
3 slices sweet prosciutto, diced
1/2 cup chickpeas
1 can whole plum tomatoes, chopped
sea salt & ground pepper to taste
12 oz orechiette pasta


In a large saucepan add enough olive oil to nearly cover the bottom. Saute the chopped onions, celery, and carrots over medium heat until the onion is soft. Add the garlic, chile pepper flakes, herbs and prosciutto. Continue cooking until the prosciutto is just beginning to brown. Add the wine and cook a few minutes more. Pour in the tomatoes along with their juice and cook over medium heat 30 minutes.

In a blender puree the chickpeas and half of the kidney beans with just a bit of water or vegetable broth. Who can't use some added protein and extra fiber in their diets? Add this puree, along with the rest of the red beans to your stockpot. Season with sea salt and ground pepper along with 2 TBLS of fresh parsley cooking another 30 minutes or until carrots are tender.

In another pot, cook your pasta al dente, and then drain. Ladle out the finished bean sauce in a serving bowl. Now layer the cooked pasta and top it off with a large ladle of more sauce. Garnish with the remaining parsley and freshly grated parmesan cheese and serve, piping hot. Enjoy!

Saturday, October 30, 2010

Potato leek Soup

The Autumn harvest brings the perfect ingredients for making delicious, creamy soups and chowders. Blending some basic ingredients can provide you foundation for a huge variety of wonderful soups. Some of my favorites are Mushroom Barley, Spicey Carrot & Sweet Potato, Roasted Tomato & Garlic and then there's Potato Leek Soup. Clearly an all time favorite around my kitchen. Truth be known, if I could get away with making a different soup every day, I could be one very happy camper. I simply love soups! But for this pretty simple concoction, the fresh leeks are the shining star and oh so yummy. Use whatever veggies you have on hand.. the more that's added, the better the pot.
What I like about leeks is that there is very little waste and they are just so tasty from tip to tail. For this soup I use almost the whole leek and save the darker tips to add to another dish.


Potato Leek Soup


6-8 mid size leeks, cleaned thoroughly & chopped
2 large onions, sliced
2 shallots, diced fine
3 garlic cloves, smashed
1 zucchini, cubed
1/2 bunch Italian kale, chopped
3 carrots, cleand & cut
4 scallions, diced
1 summer squash, cubed
7-8 potatoes, peeled & cubed ( I used red & white New potatoes and Yukons)
1/4 stick unsalted butter
2 cans low salt chicken or vegetable stock
low fat milk or light cream
sea salt & ground pepper to taste

Saute cut leeks, onions, shallots, & garlic in butter about 5-6 minutes. Rinse and cut up all your vegetables. Add to the pot with 2 cans chicken stock. Cover, and bring to a low boil and cook until vegetables are just tender. Remove cover and cool for 10 minutes. Pour vegetable mixture into Cuisinart or blender & give it a whirl until just smooth. Return it to your pot & add low fat milk (not much) or if you must.. light cream! Season to taste. Serve with Syrian bread triangles, or nice crusty bread, Serve warm or cold. Enjoy!

Tuesday, October 26, 2010

Savory Harvest Galette


Autumn to winter, winter into spring. Spring, into summer, summer into fall, So rolls the changing year, and so we seem to change menus with the season. It's pretty safe to say that Fall is officially in full swing. Up here in the northeast, the leaves have changed from green to gold, rusts and striking crimson and the crisp Autumn air has brought about the first chills of the season.

What sets Autumn's menu aside from Summer fare?-- Root crops! Most of the garden has been put to bed, the herbs are all harvested and dried for teas along with winter meals--the root crop ready for harvesting. In my basket this week I pulled beets, carrots, leeks, purple top turnips, ruby swiss chard, delicata squash, and some butternut squash from the gardens, so I decided to go with this colorful season, roasting them all up to go into a savory galette. Earlier this summer I made my first galette using fresh fruits of the season,that was just fabulous, but I've anxiously been waiting for cooler weather to try a savory version. Saturday, I picked up some goat cheese at farmers market and a couple of kambocha squash. I just love roasted vegetables and root crops--but also love their look.. beautiful and so Fall like.

Piled all over my counter, they just draw me into the kitchen thinking of delicious recipes they'll all be used in. Besides-- a combo of root vegetables slow roasting in the oven for an hour lends warmth, and great smells to my kitchen as well as go into a very satisfying dish. Perfect, for the chilly day that it was.


Combined with some carmelized onions, herbs and seasonings and fresh goat cheese. The outcome? Well it was both, very colorful and so tasty! I can't wait now to try another. :) You can't go wrong, no matter what assortment of veggies you might decide to use. Enjoy!

Savory Harvest Galette

The Pastry:

2 1/2 cups All Purpose Flour
1 cup chilled and cubed butter
1 tsp sugar
1 tsp salt
1/4 cup cold water

2 TBLS milk - to wash top of dough before baking


In a food processor, combine the flour, salt and 1 tsp sugar until well mixed. Add the butter using pulses until you no longer see chunks of butter in the dough. Use pulses to get everything to mix together correctly,and does a better job of breaking up the butter rather than letting the machine just run.

Slowly add the ice water a tablespoon at a time while pulsing the dough until it is evenly distributed and it begins to look like play-dough. If you need to add a bit more water--add it only a teaspoon at a time. You don't want your dough to be too wet-- but it should hold together nicely.

Remove the dough from the food processor and knead for a few minutes until it begins to smooth out. Don't overwork the dough, you just want it to come together and smooth out a little bit, it should really only take a couple of minutes. Cover in plastic wrap and refrigerate for about 30 minutes.


The roasting veggies:

6 medium beets, rinsed, unpeeled & quartered
4 purple top turnips, quartered
4 new red potatoes, quartered
6 carrots, cut into 1 inch pieces
1 delicata squash - unpeeled,quartered and cubed
1/2 butternut squash- peeled & cube
1/2 medium size kabocha squash, peeled & seeded
1 tsp fresh summer savory
1 TBLS fresh thyme
1 TBLS fresh oregano
1/4 cup olive oil
sea salt & ground pepper


In a large bowl toss all the vegetables with fresh herbs in olive oil. Be sure to coat them all well and turn out onto a large parchment paper lined baking sheet. Roast in a preheated 400 degree oven for an hour, until the veggies have just become tender. Remove from the oven, set aside to cool.


Carmelizing the Onions
:
3 medium sized yellow onions, peeled & thinly sliced
2 TBLS olive oil
2 TBLS unsalted butter
titch of sugar

In a large skillet stir oil and sliced onions together over a medium heat. Cover and cook slowly until very soft, about 20-30 minutes, stirring occasionally. Uncover, and add the butter and continue to cook until the onions are golden brown. I like to add a pinch of sugar at this point. Remove from heat and reserve.

Other Ingredients:

Add to the roasted vegetables and toss well:
**1/2 lb fresh chard leaves,chopped; stems removed (save for another day)
** 2 apples, peeled, cored & cubed
**********************
8 oz fresh goat cheese
4 oz grated fontina cheese
:) A mug of warm apple cider to sip as your savory galette bakes in the oven.

Assembling the tart:

Remove the dough from the refrigerator and roll out into a circle to about a twelve inch round. Don't worry if your edges aren't smooth or perfect--galettes aren't meant to be perfect, but rather rustic looking. Take a pastry scraper and transfer the dough round to a parchment paper lined sheet pan. Mix the cheeses together and spread onto center of pastry. Next, evenly distribute the roasted vegetables over the cheese, leaving a two inch border of pastry uncovered. Now top with the carmelized onions. Drizzle with just a bit of olive oil and season with sea salt & ground pepper. Free fanfold the edges of pastry over the mixture, pinching the dough as you go along to seal. Brush the crust with milk and bake until golden brown, about 35-40 minutes. Remove to a wire rack to cool. May be served warm or at room temperature. * Note.. I ended up with about 1 1/2 cups vegetable filling left over in this galette, so we used the leftovers in a breakfast omelet the next day. Enjoy!

Wednesday, October 6, 2010

Harvest Plum Bread Pudding


Fall is officially here and I just love baking during this time of year. One thing that's near and dear to my heart is bread pudding! It's one of my favorite Autumn desserts, plus, it's a great way to use up breads that are about to go stale. With just a few ingredients, bread pudding makes such a homey, comforting dessert.

Who can resist the fragrance of warm cinnamon and spice on a chilly Autumn night? Soft cushions of assorted country breads lightly browned on top with a creamy custard below. Served warm, with a topping of vanilla bean ice cream and a drizzle of Amaretto sauce--not me for certain!

I had on hand a half loaf of peasant bread and a half loaf of crusty cinnamon raisin bread -- so this is what I used, plus we really enjoy the texture using a crustier grained bread in the pudding. I just love all those nooks and crannies where the cinnamon and spice can find it's way in to.

Because we are such big fruit eaters here and I still had on hand a few fresh plums in my basket after making some plum jelly, I tossed in a few of these along with just a bit of mashed pumpkin puree. The plums added just the right amount of tart to the recipe to offset the sweetness. Sometimes I use wild blueberries or apples or just plain old raisins, so you can't go wrong here using what fruits you have on hand. This bread pudding is packed with down home flavor and makes a wonderful addition to your dessert menu. The Amaretto sauce is to die for -really! But I'm one of those that just has to have that scoop of vanilla ice cream on any bread pudding I make as well.


Harvest Plum Bread Pudding

1 cup whole milk
1/2 cup light cream
1/2 cup sugar
3 eggs, beaten
5 cups cubed day old stale or crusty bread
3/4 cup chopped plums- about six
1/2 stick unsalted melted butter
1/4 cup canned pumpkin puree
1/4 tsp salt
1/2 tsp cinnamon
1/8 tsp each ginger, allspice & a pinch of cloves
1/2 tsp vanilla extract
1/2 cup raisins if you aren't using a raisin bread

Cut the bread into cube sized pieces and place in a good sized bowl. Add cut pieces of plums, tossing with the bread cubes. Drizzle the melted butter over the bread cubes and toss all gently and set aside.

In another bowl, whisk together eggs.. once frothy, add in whole milk, cream, pumpkin, sugar and spices. Gently whisk a bit more after each addition. Place your buttered bread cubes in a greased 2 qt casserole dish. Give the egg mixture one last mix and pour evenly over the bread cubes. Place casserole into a larger baker filling it with water about a third of the way up the sides of your pudding dish. Bake in a pre-heated 375 degree oven for approximately 30 minutes or until set and golden on top. Serve warm with vanilla ice cream and some Amaretto cream sauce on top. Enjoy!


Amaretto Cream Sauce

1/4 cup powdered sugar
5 TBLS unsalted butter
3/4 cup cream
1/4 cup milk
1 egg
4 TBLS Amaretto liqueur

In a samll bowl dissolve the cornstarch in the Amaretto, whisking until smooth. In a saucepan scald the cream and milk over medium heat. Melt butter for 30 seconds in microwave and add to the scalded milk. Add the Amaretto slurry to the hot cream and bring to a gentle boil whisking constantly for 30 seconds. Remove from heat and add the powdered sugar. Whisk until completely dissolved. Cover and allow the cream to cool completely before serving over the bread pudding. See if you can resist a second serving. :)

Thursday, September 30, 2010

Italian Meat Pie - Scaciatta

Well, they are finally gone. As prolific as they were this year, every last pepper in my garden has been used. I've stuffed them, roasted them, marinated them, they've topped more than one sausage sub around here, they were included in a nice eggplant caponata, but enough is enough! I just know I'll be regretting these words come January.
So today I tried something a little different for me. A dish I make often, but never include peppers. Surprisingly, it turned out just great!


I made an old family favorite -- scaciatta (pronounced ska cha ta) or Italian meatpie or as some call it, pizzachino. I really don't consider this dish a pizza rustica, but you may. This dish is a two-crust pie of risen dough and typically filled with any assortment of meats, tuna, anchioves, vegetables or cheeses. In this meat pie I combined seasoned pork, veal and a little ground beef along with an assortment of my remaining peppers--both sweet and hots, some red wine, chopped onions, and of course, garlic. Earlier this year I posted my recipe for spinach pies. I use my same dough recipe but different fillings and shapes, or you can use a store bought, ready to use pizza dough. But any way you slice it -- they're all good. Served as an appetizer, late night snack or a side with a big salad and if you should have any leftovers, pop the slices into your freezer. They keep beautifully and you'll have a delicious and handy quick meal on those occasions when you just don't want to prepare a large dinner.
I ended up with about 1 1/2 cups of extra filling left over, so later this week I'll be making a chard pie topped with my leftover meat pie filling. As I said, anything goes here. Get creative!

Italian Meat Pie -- Scaciatta

fresh pizza dough - enough to make two 12 inch rounds
olive oil
4 garlic cloves, smashed
1 large onion, minced
2 sweet red peppers, cut fine
2 green peppers, cut fine
3 hot peppers - cut fine, *optional
1 large potato, cut in tiny pieces
1/4 cup red wine
1 lb ground sweet Italian sausage
1 lb ground veal
1/2 lb lean ground beef
1/8 cup homemade spaghetti sauce (not gravy :) - *just enough to lightly coat the meat/vegetable mixture
parmesan cheese
pecorina romano cheese
shredded mozzarella cheese
ground pepper
ground fennel seed
basil, sweet marjoram, thyme, oregano, parsley to taste

In a large skillet, saute in olive oil the garlic, onion and potatoes until just tender. Add the rest of the vegetables along with the red wine and cook for 6-8 minutes over a medium heat. Next, toss in all the ground meats, incorporating well with the vegetables. Season with ground black pepper, herbs and cook until the meat is finished about 15 minutes or so. Add spaghetti sauce -- I ended up using 8 TBLS total-- just enough to lightly coat the mixture. Put a cover on your pan and let the mixture cook down a bit. Once cooled, I always pour off any excess oils by tossing the entire mixture into a collander. As this has been slowly doing its cooking thing, you can roll out your dough into two rounds. Coat your baking sheet with olive oil, wiping off any excess and place your first dough round onto the sheet, overlapping the edge some. Sprinkle parmesan cheese over the dough, and then again with pecorino romano. Begin to add the cooked and cooled filling, leaving a two inch border until you've covered the entire center of pan. You'll be rolling that portion upwards to seal your pie. Once again sprinkle with grated cheeses and top with some mozzarella cheese. (I used a multi package of mozzarella, fontina, asiago blend.) Here's a few photo's up to this point of preparation.


Pretty easy so far? Just about everyone has a few bags of pizza dough in their freezers -- at least I hope you do :+) Now all that's left to do, is to add your cover crust, pressing it in place to seal over the meat mixture only. And finally draw the bottom crust in a rolling action upward while pressing at the same time to seal well all around the meatpie. You want all the filling to remain in your pie without oozing out everywhere. Just give the top crust a few stabs with a fork,to vent it, and just a bit of drizzled olive oil rubbed over the crust and pop this bad boy into a 375 degree oven for approximately 25 minutes total, or until golden brown.


Once you remove it from the oven, cover it lightly with some aluminum foil and allow it to cool down completely, before slicing. Enjoy!

Sunday, September 26, 2010

A day of nothingness

    Though the date says it's the end of summer, I was secretly  keeping my fingers crossed for a few more nice days. Yesterday I got my wish -- a simply gorgeous day with temps here in the 80's! A perfectly fine day to celebrate National Estuary Day and Punkinfiddle Festival. It was the last of my outdoor shows, excluding a few more weeks of  farmers market--but then the growing season comes to an end :(  What a fabulous season it's been for gardeners. I still have more cold crop & root veggies left in the garden and way too much kale, chard and turnips left, but I'm looking forward to preparing those comfy Autumn meals I love so much. This morning I picked my corn stalks and a few pumpkins to decorate the entryway and then it began to rain.


So I decided to make the rest of the day  a me day. You know--those days you steal away from your everyday lists of things to do. and simply take a long overdue break.  Italians have an old expression--il bel far niente, which means “the good do nothing.” As I reflected on recent past weeks of events I was reminded how good my life has been. A great family, close friends-the kind you can really count on, wonderful memories, and no regrets. Well, perhaps one itty bitty one. But hey, there's always next year. Real life occurs to us all, and includes all the ups and downs and in betweens that go along with it, right?

This week we were suppose to travel back to Tuscany for an anniversary trip, but then real life stepped in, so we've postponed those plans. It just wasn't in God's plan this year. But, I believe with all my heart, next year for certain. Nod your head if you're listening god.

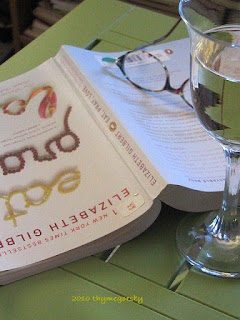
So I'm taking the day off, re-reading one of my fave books and remembering our last visit to Italy. I wasn't even planning to cook a meal today -- but then just had a hankering for mussels and pasta.. The summer's disappearing and we simply love mussels prepared any way. but my favorite is mussels marinara.  Quick and easy and you only need a few ingredients, So instead of meal planning, I went back to Italy today-- here's a few of my fave pics.


If you should get hungry along the way make yourself a big bowl of mussels marinara and dream of a hill town in Tuscany; Panzano, San Gimignano, Montepuliciano, Cortona, Siene, Rhadda in Chianti, Lemole. Be sure to stop at every gelato shop and try a new flavor too!  Or head south and take a drive along the amazing Amalfi coast,. Be sure to stop in Sorrento to sample the limoncello and sample the quiet out of the way family run ristorantes,  Positano perhaps.. a small quaint, and remarkabley hilly town ( you'll really get your daily workout ) with lovely shoppes or a cozy dinner in Rome-- historical, cosmopolitan with fountains galore! Vatican City and Sistene Chapel -- Michaelangelo's work of art simply breathtaking. Be sure to toss your lucky coin in Trevi Fountain. You'll need a great meal after all the sightseeing you'll be doing while there or  in Florence for that matter--known for it's world class fashion, by their own world class designers.  If you're into art you won't want to miss Uffizi Gallery and of course no one misses a visit to the Duomo and Bell Tower, or Statue of David and be sure to pick up a trinket or two or three :-) when you visit the Ponte Vecchio's which spans the river Arno.  Maybe you'd love a visit to the romantic Isle of Capri. Rent a boat and let the local fisherman give you the tour.  Nothing beats the pizza and pastries in Naples... but then I'm partial.   Memories -- they sure beat working on your list of things you should be doing today :+)

Mussels Marinara

                                                            
2 lb mussels, rinsed & bearded
4 garlic cloves, smashed & minced
2-3 TBLS fresh parsley, minced
1/2 cup olive oil
3/4 cup pinot grigio
11/2 cup tomatoes, chopped
red pepper flakes
1/2 cup clam juice
1# linguini

In a large pan heat olive oil.  Add garlic, mussels, tomatoes, wine, clam juice and hot pepper flakes.  Cover and cook until all the mussels have opened.  Discard any mussels that have not opened.  As the mussels are cooking toss your pasta into a boiling pan of water and cook til just al dente. Once the pasta is ready, drain and pour the mussels and tomato mixture over the pasta, sprinkle on the fresh parsley and toss well. Serve with crusty peasant bread and enjoy!


Sunday, September 19, 2010

You're the blogger

Saturdays are busy days for me, and this Saturday was no different than most - so I thought.  I was busy setting up my booth, when my girlfriend Marsie popped into my booth at Kennebunk Farmers Market to ask me for my autograph??  I replied. 'Marsie what in heavens are you talking about'?  She laughed and said, she was sitting at her kitchen table having her morning coffee when she opened her newspaper to find an article about three local bloggers.  And as luck would have it, I was one of them! I interviewed so long ago, I had forgotten all about it, and I hadn't been to my PO Box all week to read my own newspaper, as dh is back in the hospital.  So she ran into the local pharmacy nearby just to pick me up a copy to see.  Thanks so very much Marsie xox.


Then market opened up for the day, and as my customers came into the booth -- instead of sniffing all of my soap offerings, instead I just kept hearing, 'You're the blogger!' What a fun way to spend at our newly acquired title, "Maine's Best Farmers Market" yakking about food, veggies and sharing recipes.  It really made my day!
So, anyone who's stopping by due to the YCCS article, howdy and welcome! Happy to have you here :-)

Saturday, September 11, 2010

Fresh from the garden - Eggplant parmesan

What a great season this has been for many gardeners here in the northeast. We were lucky side stepping a bit of blight that only a few witnessed this year, as opposed to last summer. What a nightmare! This week I harvested the rest of my ripened tomatoes, many eggplants and far too many peppers. So I have been busy roasting tray after trayful of yummy roma's. The rest of the tomatoes were canned, or frozen--or went into sauce and some even into jams.

With this last basketful of assorted tomatoes,herbs and veggies, I prepared a pot of chili and then  last night, one of my favorite eggplant dishes...eggplant parmesan. Now all I have left to put up is my annual piccalilli and I won't even have to go out and buy  green tomatoes this year :+) 

Eggplant Parmesan

3 medium sized eggplants
1 cup flour
3 eggs, beaten
3cups Italian bread crumbs
olive oil for sauteing
marinara sauce (recipe follows)
1/2 cup grated Romano cheese


1/2 cup grated Parmesan cheese
1 pounds of mozzarella cheese,shredded
2 cups of ricotta cheese

After rinsing the eggplant, slice them into 1/4-inch thick slices. Place the slices on a layer of paper towels and sprinkle with a little salt, then cover with another layer of paper towels and hold it down with something heavy to drain the excess moisture. Let them sit for about a half hour.

Take one slice of eggplant at a time, dust with flour, dip in beaten eggs, then coat well with breadcrumbs.Saute in preheated olive oil on both sides until golden brown.


In your baking dish, alternate layers of marinara sauce, eggplant slices, ricotta, parmesan and Romano cheeses, until you almost fill the baking dish. Cover with shredded mozzarella cheese, and bake for 25 minutes covered,in a 375 degree oven. Let it rest for 15 minutes before serving. Enjoy!


Marinara Sauce

2 TBLS chopped garlic
3 TBLS olive oil
6 cups chopped tomatoes
1/2 cup onions, chopped
1/4 cup dry white wine
1/2 cup of fresh parsley, minced
1 tsp oregano
1 tsp crushed red pepper
1/8 cup fresh basil, chopped fine
pinch of thyme, savory & rosemary
2 bay leaves
1/2 tsp sea salt
One tsp white pepper
pinch of sugar

Lightly saute the onions in olive oil in large pot for a few minutes. Add the garlic and saute another minute. Add the wine with the tomatoes and bring sauce just to a light boil, then turn heat to low.
Add remaining seasonings and herbs, cover and let simmer for one hour, stirring occasionally.

Tuesday, August 31, 2010

Coffee brandy ice cream float

Want to go down memory lane with me? Close your eyes and come with me, on a trip down memory lane to the place where red and white checked dreams come true. Many of us from the older generation can remember going to the local soda fountain for a burger and a shake or to have a burger and fries after school.

Many were decorated with red bar stools and black and white floors and if you were lucky enough those miniature juke boxes just ready for you to plunk your coins in to listen, while you waited for your orders. Two plays for a quarter no less that featured old 45's that I know I haven't heard in years. Our local soda fountain was in the 'square' of town, in a corner drugstore--Halls Drug.

Every afternoon as school let out Mr Hall readied for the slew of kids that would be pushing their way into his store just about 3 o'clock every weekday afternoon. Two of my favorite items were lime rickey's and rootbeer floats. It's funny the way our minds sometimes work-- remembering the little things, we sometimes can recall from back in those good old days. One thing that stands out in my mind was looking down the row of spinning bar stools to see so many pairs of dangling saddle shoes and poodle skirts swirling around. You do remember saddle shoes don't you? Nope, they weren't specialty fit shoes for the equestrians. And also how Mr Hall would always serve your orders--first he'd re-wipe off the counter in front of your seat, and then neatly place a paper napkin followed by your order placed on top. He was such a quiet, yet sweet old gent who seldom forgot to ask 'would you like 'jimmies' on top' regardless of whether you ordered a milk shake, ice cream soda, or banana split! It was just one of his little quirks.

Many of the great recipes for our best frozen confections have been lost to us and, since I just love ice cream, and just made a new batch of coffee brandy a few weeks ago, I decided to try a new twist on an old favorite-- So this is my recapture the nostalgic flavor of childhood but with a grownups-only version of the root beer float. With the heat wave we've all been having this past week, this was a deliciously thirst quenching treat. Don't forget to put a scoop of your fave ice cream on top before serving and cool off! Autumn's just around the corner.


Coffee Brandy Ice Cream Float

* ¼ cup of milk
* 3 TBLS coffee brandy - recipe follows
* 1 scoop coffee ice cream
* club soda

Mix milk and coffee brandy together in a tall glass. Then pour club soda over top to fill the glass about ¾ of the glass full, and then top off with a scoop of coffee ice cream & cool off! Enjoy.


Homemade Coffee Brandy

3 cups water
2 1/2 cups sugar

Bring to a boil and simmer 15 minutes.

1/2 cup instant coffee - I used Colombian
1/2 cup boiling water

Dissolve and add it to the above mixture.

Cool all and pour into a half gallon canning jar. Then add 2 bourbon vanilla beans split lengthwise, and 3 cups of brandy and 1/4 cup quality vodka. Cover and store in a cool cupboard 3-4 weeks.

Monday, August 16, 2010

Chicken Marsala

This is one of my favorite chicken dishes, and one I make often, it seems we never tire of it. It’s quick enough to whip up on a weeknight, and always a hit when served to dinner guests. So if you need a dish that looks like you've been slaving in a hot kitchen all afternoon, give this a try-- it's just wonderful.

The best part for me is the mushrooms - they absorb all the flavor from the marsala wine and delicately rich sauce. I served this with Jamie Oliver's recipe for chilled roasted vegetable farro salad. The salad was very flavorful, but I couldn't get past the coldness - so I warmed it up a bit before serving.

If you don't have any Marsala wine on hand, and need to pick some up, just be certain of two things -- You don’t need anything too expensive, and make sure it’s just regular dry Marsala wine, and not Sweet Marsala, a desert wine, and too sweet for this dish. This same recipe can also be made the with veal cutlets with very nice results.


Chicken Marsala

1/4 cup flour
4 boned & skinless chicken breast, pounded flat-- cut into medalians
sea salt and white pepper
1 TBLS butter
2 TBLS olive oil
2 oz of dry Marsala wine
3/4 cup mushrooms, sliced
1/2 cup chicken stock
juice of half a fresh lemon
1 TBLS fresh parsley, minced

Season the flour with salt and pepper. Lightly dredge the chicken medalians with seasoned flour. Heat the olive oil and butter in a medium size skillet. Place the chicken pieces in the pan and brown on both sides. Once browned remove from pan and set aside.

Add the Marsala wine to your pan and gently bring it to a boil. Add the chicken broth, lemon juice and stir in the sliced mushrooms. Lower the heat and cook for about 10 minutes reducing the sauce. Return the cooked chicken medalians to the pan and spoon over the Marsala sauce. Cook for five minutes more on each side until warmed through. Sprinkle on some fresh parsley and serve with roasted vegetable farro salad or over linguini or pasta of choice Enjoy!

Saturday, August 14, 2010

Wild Blueberry Cobbler

High bush blueberry season has gone by. Peach season is flourishing and now our wild blueberries are turning up on most of the northern routes. We are simply wild about Maine wild blueberries. There's something so special about these gorgeous berries that clearly sets them apart from any other crop. Add to that their status as nature's number one antioxidant, their incredible nutritional value, and their ability to help in the prevention of cancer. Pretty impressive yes? But for us, even moreso, is the fact that 90 percent of the wild blueberry crops harvested each year in the USA comes from our home state of Maine. And because our wild blueberries have become so popular, this adds up to approximately 30 million pounds of blueberries a year. Even more impressive!

Wild blueberries aren't planted as high bush berries. Rather, the fields and barrens where they thrive here in our pinetree state, are carefully managed to encourage the plants to grow in a healthy sustainable fashion. Many suggest that our acidic soil and harsh winters that prevail here in Maine, where the land is wild and generally inaccessible, where the winter temperatures can dip down as low as -30 and the ground too acidic for most plants to thrive, all may be part of the reason that they are so rich in the natural chemicals that provide the health benefits associated with the fruit. Wild blueberries aren't farmed in the traditional way, the bushes simply grow where nature takes them -- and up north they are even still picked in a traditional way as well, by hand. Whatever the reason is, we think they are simply the berries!

Last week we went up to Machias and Blue Hill area of Maine and then down to Booth Bay Harbor, ending up in Pemaquid Point. You can always tell it's August in our neck of the woods -- you can smell the berries in the air. Blueberry farms galore! Along the roadsides you'll find literally hundreds of vendors selling fresh berries. We stopped by one and I picked up a bushel basket to freeze for winter baking along with morning cereals. The nicest thing about these delicious morsels is that wild blueberries, as opposed to highbush berries never lose any of their punch. All that healthy goodness remains in the berries as though you were eating freshly picked.
So the next time you are pouring your morning cereal into a bowl, be sure to add a handful of our naturally healthy and so so scrumptious wild blueberries. Or add some to your favorite blueberry cobbler. Here's a family recipe that's been around longer than I can recall -- my Grandma's Wild Blueberry Cobbler.


Grandma's Wild Blueberry Cobbler

Mix together:
3/4 cup sugar
1/4 cup butter
1 egg

Stir in 1/2 cup whole milk

Sift together:
2 cup flour
1/4 tsp salt
2 tsp baking powder

2 cups wild blueberries -- washed & drained
sugar, cinnamon powder, flour

Gently mix with egg mixture. Set aside 1/3 batter to use as topping. Spread the batter into a greased and floured 9 inch square baking dish. Fold in 2 cups washed & drained wild blueberries that have been tossed with sugar, cinnamon and 2 TBLS of flour. Dot blueberry layer with four pads of butter and scoop remaining reserved batter in pieces and sprinkle the top. Dust the top with 1/4 cup sugar, 1/2 tsp powdered cinnamon. Bake cobbler 35-40 minutes in a 350 degree oven until browned on top and blueberries just beginning to burst open. Serve warm with vanilla ice cream or sweetened whipped cream. Enjoy!

Pemaquid Lighthouse

Wednesday, July 28, 2010

How do you spell relief

It being ice cream month, along with a gentle nudge from my friend Louise at Months of Edible Celebrations, who says she can easily 'scoop up gallons of ice cream' passed on a link heading me to Modern Day Ozzie and Harriet,and, the best darn peaches and cream ice cream recipe I've ever made! Now that's how I spell r-e-l-i-e-f!

Is there no end in sight for these dreadful muggies we are seeing? Well let me assure you--if you are sweltering in your neck of the woods give this absolutely cooling and scrumptious recipe a try. I've been assured you'll sweat off the calories after ingesting --lickety split! I just knew it was in the stars when I went to farmers market Saturday to pick up my tray of fresh peaches to make more peach jam. I made mention to my friends Ann & Howard that I'd just love to make some peach ice cream one of these days so they insisted I take home some slightly bruised peaches to give it a try.

When I arrived home--I started my prep work for the jam, when I recalled reading a post over at Louise's blog mentioning National Ice Cream month--so back I went to re-read her post. It was there that I hit the jackpot! A link to Marjie's blog with easy instructions, and even better, I had all the ingredients in the house. The only changes I made to her recipe was to substitute almond extract, for the vanilla, added a titch of cardamon powder and used heavy whipping cream for the 'cream'. I also cut back just a bit on the sugar amount called for and as my ice cream maker was chugging along we just couldn't stop ourselves from sampling spoonful after spoonful of this luscious blend. My ice cream maker makes two quarts and as luck would have it--so doesn't this recipe.


Peaches N' Cream Ice Cream

Slightly modified. Recipe by Marjie at Modern Day Ozzie and Harriet


6 large peaches--washed, pitted and cut into chunks (skin & all)
1/4 cup sugar
1 1/2 cups milk
1/2 cup sugar
1 1/2 tsp almond extract
2 cups heavy cream (whipping cream)
a pinch of cardamon powder *opt

Place the peach chunks into the food processor and whirl via the pulse button until moderately chopped. I didn't want it to end up a pureee of peaches. It's one of the things I really enjoy about peach ice cream--finding those delicious pieces of fruit with every lick. I also liked the idea of leaving the skins on the cut fruits for that added extra fiber, as Marjie suggested. Once the peaches have been chopped, sprinkle on the 1/4 cup of sugar--give it a couple of whirls and allow fruit mixture to rest, about an hour.
After the time has elapsed, whisk in the remaining sugar into the milk,along with just a pinch of powdered cardamon. combining well. Then whisk in the almond or vanilla extract and heavy cream. Gently stir in the peach mixture and pour into your ice cream maker and process according to manufacturer's instructions. I processed mine 25 minutes. I packed it into two 1-quart containers knowing it won't last the week. :) Enjoy & stay cool!

Stuffed Pattypans


My refrigerator drawers are overflowing with squash! Summer squash, zucchini, crooknecks, cousa and those sweet pattypans. Thank goodness the delicata, hubbard and butternuts are still weeks away. My freezer is overflowing with frozen squash for winter baking. We had a little break in the humid weather this week so after bringing in the evening pick from the garden with even more squash I decided to try a Jamie Oliver recipe that's been sitting on my desk for a few weeks for a farro salad.

Part of the recipe called for roasting garden veggies--and that I had more than enough of around here! I roasted so much that I ended up with enough for two meals, and after all that roasting decided I didn't even want a large meal, so I set some aside and with the other half, stuffed my fave squash of the summer--the pattypan.
I know, how much stuffed squash can one possibly eat? LOL But we just enjoy them so.. and there was a method to my madness after all. Right around the corner all the tomatoes, cukes and peppers will be ready to harvest and I have no drawer space left.

You may use any vegetable that's currently being harvested in your garden--it's all great in my book. I used a combination of crumbled feta and grated fontina cheese because that's what I had on hand. Feel free to experiment on your own.


Stuffed Pattypan Squash

2 medium eggplants cut into chunks
2 summer squash, halved lengthwise and cut
2 pattypan squash, halved and quartered
2 zucchini, halved lengthwise and cut
2 cousa squash, halved lengthwise and cut
2 sweet red peppers,halved, deseeded and chopped
1 bulb of fennel, trimmed and thinly sliced
1 medium red onion, peeled and cut into wedges
2 shallots finely chopped
4 garlic cloves, minced
1 lb ground lamb *optional
1 cup cooked jasmine rice
2 TBLS lemon rosemary olive oil
2 TBLS minced fresh parsley
½ tsp summer savory, minced
1/4 teaspoon minced fresh thyme
sea salt & ground pepper to taste
2 oz crumbed feta cheese
3 oz shredded fontina cheese
6 additional pattypan squash-washed & scooped out

Wash, pat dry and cut all the vegetables. No need to be fussy, as you will cut them all again once they've been roasted. Toss them all into a large bowl and drizzle olive oil over and toss very well, so that they all been coated in the olive. Place them onto your parchment lined sheet pans, sprinkle fresh herbs, seasonings and one last drizzle of olive oil. Try not to overlap the vegetables on your cooking sheet though, so that they will roast better this way. Roast in a 400 degree oven for approximately 30 - 40 minutes, or until the vegetables are cooked through and just crisping around the edges. Sprinkle a little white vinegar over the vegetables as soon as they come out of the oven and set aside to cool. Once the vegetables have cooled, dice them up into smaller, bite sized pieces.

As your vegetables are roasting, trim tops and with a spoon, scoop out pattypan pulp. Chop and reserve.

In a skillet saute the shallots, and ground lamb in a bit of olive oil. Add the chopped pattypan pulp last and cook for just a few minutes.

Add cheese mixture to the roasted vegetables, the jasmine rice and blend this with the lamb mixture and toss gently. Spoon mixture into reserved pattypan shells. Sprinkle with paprika. Place in an ungreased baking dish and pour water or vegetable stock into bottom of pan about 1/4 way up the side of the squash.
Cover and bake at 350° for 20-25 minutes or until heated through. Uncover and bake 5 minutes longer or until cheese is lightly browned. I like to spritz fresh lemon juice over these pattypans before serving. Enjoy!

Friday, July 23, 2010

Pearls of pleasure--Blueberries


Think pearls. No, not the neck adornment, but instead hundreds of perfectly round orbs. Think blueberries. I know, I went a little blueberry crazy here. But, I mean, BLUEBERRIES! How can anyone not love those plump, sweet blue pearls of utter sweet and so healthy goodness? Yes, I went blueberry picking again, and in just a short time collected 20 pounds of fruit, enough to gorge ourselves and have plenty leftover to freeze for later holiday pies and winter desserts. And we musn't forget homemade blueberry ice cream. I’m so glad its summer.

Sure there are other delectable berries. Strawberries in late June and then the fragrant delicate raspberries (another personal favorite)and then the thorny, meaty blackberries of our late summer. But by far, my favorite berry of the season are blueberries! Crisps,grunts,scones,cheesecake, turnovers,cobblers, pies -- even Tuscan chicken--the list goes on and on in my kitchen when it comes to blueberries. But one thing I'd never tried is making a galette. I don't know why. I just love the rustic look and carefree assembly about them. Savory, or sweet. You get to decide what fillings will go into them.

For my first I wasn't going to pass up the chance to use up some of my fresh picked blueberries along with some fresh peaches our good friends Ann & Howard gave us, from their fruit farm along with her famous honey peach jam recipe. Thanks so much Ann for your generosity--your delicious peaches were the perfect addition to my first galette. And the jam turns out just awesome!

I ended up making two smaller galettes, about nine inch rounds and delivered the 2nd one to my good friend Lee who has a sweet tooth as large as my own. :)


Blueberry Peach Galette

Pastry

2 1/2 cups All Purpose Flour
1 cup chilled and cubed butter
1 tsp sugar
1 tsp salt
1/4 cup cold water

2 TBLS milk - to wash top of dough before baking
2 TBLS sugar - to sprinkle over crust

In a food processor, combine the flour, salt and 1 tsp sugar until well mixed. Add the butter using pulses until you no longer see chunks of butter in the dough. Use pulses to get everything to mix together correctly,and does a better job of breaking up the butter rather than letting the machine just run.

Slowly add the ice water a tablespoon at a time while pulsing the dough until it is evenly distributed and it begins to look like play-dough. If you need to add a bit more water--add it only a teaspoon at a time. You don't want your dough to be too wet-- but it should hold together nicely.


Remove the dough from the food processor and knead for a few minutes until it begins to smooth out. Don't overwork the dough, you just want it to come together and smooth out a little bit, it should really only take a couple of minutes. Divide the dough in half, flatten into discs, cover in plastic wrap and refrigerate for about an hour. At this point you can also freeze this dough for later use, up to a couple of months. Seldom does it last this long in my freezer during fruit season.

Preparing the filling


2 1/2 cups fresh blueberries
2 1/2 cups sliced peaches
1/4 cup sugar
1/2 cup light brown sugar
1/2 tsp cinnamon powder
pinch of cardamon powder
2 1/2 TBLS tapioca powder (I found mine in an Asian grocer) or cornstarch
2 TBLS honey peach jam
3 amaretto cookies-crushed
1 egg & a bit of milk

While your dough is chilling, prepare the filling. Place the blueberries and peach slices in a bowl. Add the sugars, cinnamon, a pinch of cardamon powder,tapioca powder (or cornstarch) and stir gently. You want the fruits well covered.

Preheat the oven to 350ยบ.
Remove one of the discs of dough from the refrigerator and roll out into a circle to about an eleven inch round. Don't worry if your edges aren't smooth or perfect--galettes aren't meant to be perfect, but rather rustic looking.. as you can see from my first one...it's pretty rustic :) You’re in good shape. Take a pastry scraper and transfer the dough round to a parchment paper lined sheet pan.

Now crumble up the amaretto cookies and place in the center of your rolled out pastry disc. (I like to add these crumbs to most of my fruit pies--they help to absorb much of the excess juice that will form while baking, so I figured I couldn't go wrong here.) Yup, pile the crumbs right in the middle. Give your bowl of fruits one last stir and layer right over the cookie crumbs and spread around leaving a two inch border of dough.

Roughly fanfold the 2 inch border of crust all around your galette every couple of inches or so and give each fold a gentle pinch to hold it in place. I have to admit, I needed to do my fanfolding twice to get it to look the way I had it envisioned in my mind--but there are no rights or wrongs to doing this step. Take two tablespoons of peach jam and spread it over the fruits. Beat egg with milk and brush over the galette dough and sprinkle with sugar. Pop it into the oven and bake for approximately 30 minutes or until the crust is golden brown and the blueberries are bubbly. As the first galette is baking, prepare your second one or save the dough for another day of berry picking!

Here's where the hard part comes in. Remove from the oven and cool very well before slicing. As you can see from my photos, I moved one a little too early and my dough cracked. But did this stop me from having a second piece piled high with vanilla bean ice cream? Nope! :-) Simply too scrumptious to pass up! Enjoy!


Wednesday, July 14, 2010

Rosie Risotto & dear friends


I have a lot on my plate right now, but sometimes that can be a good thing. My dh has been undergoing oncology care again--this time with stem cell transplant, and with my being his sole caretaker, I haven't had a lot of time in the kitchen or garden for that matter. With it being the height of gardening season, it's so great to know we have the best garden friends in the world!

This group of dear friends took it upon themselves to do my harvesting for me temporarily. What a blessing they are. Peas, peppers, beets, chard, cousa, zucchini and squash squash squash. Well you know the drill. No matter how well you plan your gardens -- once that heat finally arrives -- and it surely has - it all seems to mature overnight. This past weekend they came with baskets filled with our veggies, and as it turns out, a strong day for my dear patient. We decided on a potluck dinner with everyone contributing dishes from their own harvest along with just caught fresh cod.

With pounds of fresh peas in my own basket, I made a roasted eggplant, peas and pepper risotto. Yes, it's always a favorite around here -- and well tolerated at times like this. Even better there's nothing magical about preparing it. What I love the most about making risotto is how versatile and forgiving this dish can be. Dress it up or dress it down. It's always delicious in my book. You can find my basic risotto along with many more risotto recipes here.

Before serving the risotto, I dressed her up a bit with parsley and fresh calendula blossom in her 'hair' and we all named her Rosie -- Rosie Risotto -- mostly because it was a good day, especially for dh. :)

When I said I had a lot on my plate, I wasn't joking.. I really made way too much! So with my leftover risotto I managed to make three more simple meals for us this week, my Nunie's arancine, stuffed beet leaf holubsti and fried risotto cakes. Amazing isn't it, how far a bowl of risotto will go!

Nunnie's Arancine filled with pecorino cheese and bits of meatballs


Fried Risotto Cakes rolled in a seasoned panko crumb


Stuffed Beet Leaf Holubsti with a scrumptious dilly sauce that I'll be posting up next week.


Rosie and dear friends have been such a big help to me this week. Thanks guys so very much! xoxo

I'll only be blogging weekly at best for the next few weeks friends. Thank you for the notes and prayers, understanding and for coming back!